
Suction machine cleaning is one of the most under-taught aspects of home care equipment in Pakistan. It is not complicated, but it needs to happen consistently and correctly, and cutting corners costs patients real infections. This guide walks families through suction machine cleaning realities — daily routine, weekly deeper clean, monthly inspection, and how to build a habit that keeps the machine actually protecting the patient rather than becoming a hazard. Nothing here replaces the manufacturer's specific instructions for your model or the nurse's specific technique training.
Why Suction Machine Hygiene Matters
A suction machine pulls secretions from a patient's airway into a collection jar, through tubing that stays inside the machine or bedside for repeated use. If any part of this pathway becomes contaminated with bacteria:
- Every subsequent suction potentially pushes bacteria into the airway
- Aerosols from the machine's exhaust may spread organisms into the room
- The collection jar becomes a reservoir for organisms that grow rapidly in warm secretion
- Patients with tracheostomies or ventilators are already at high pneumonia risk — contaminated equipment multiplies that risk
Cleaning is not a "when we remember" task. It is part of the safe operation of the machine.
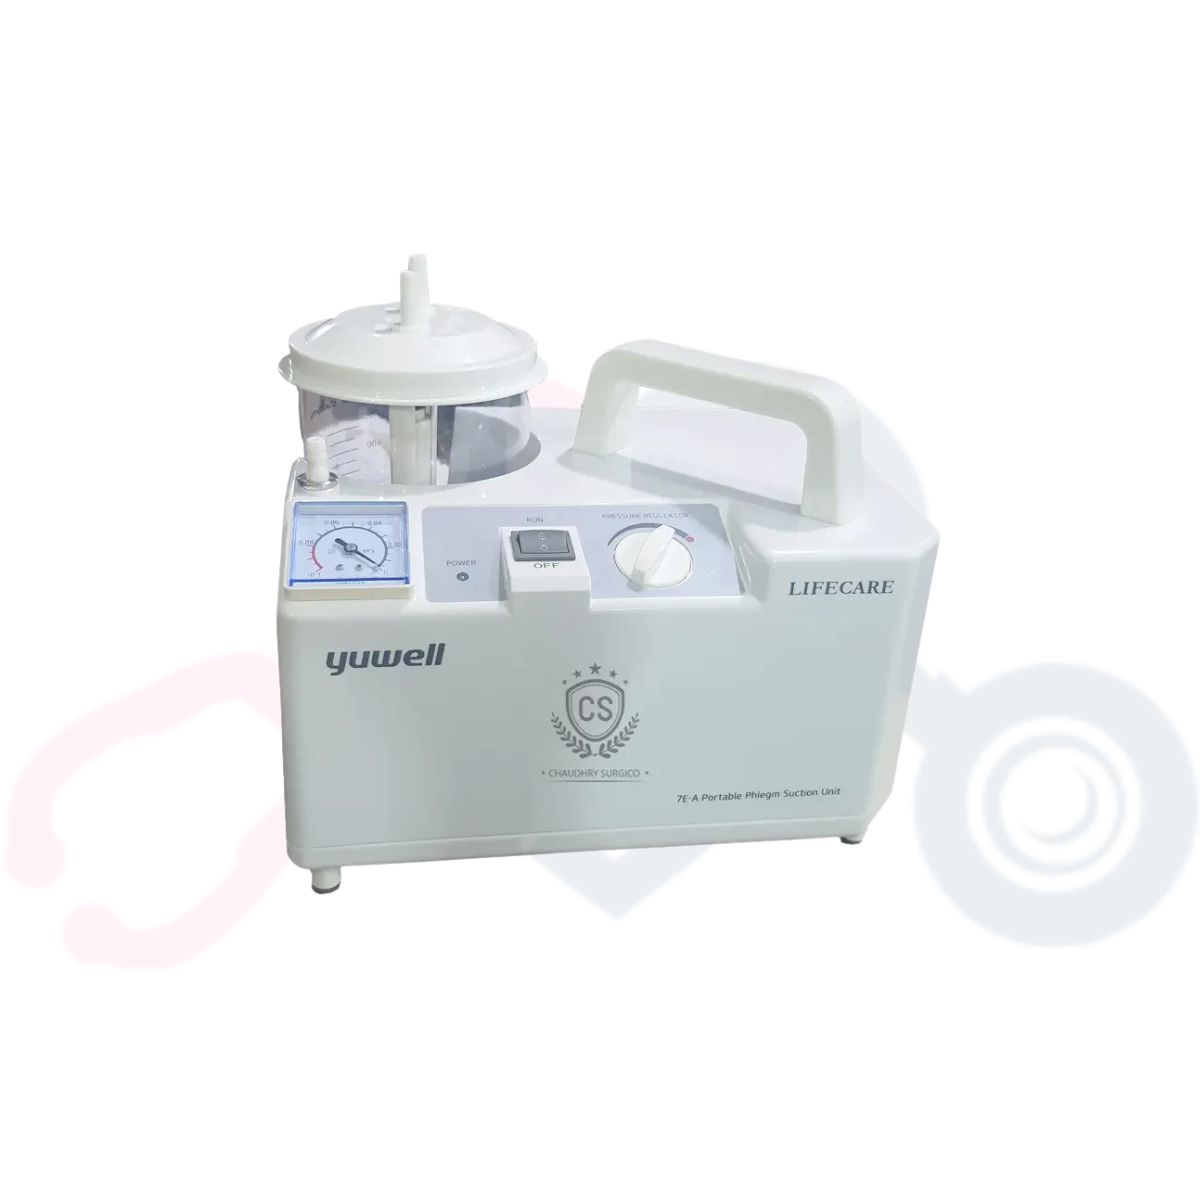
Portable Suction Machine
Heavy-duty aspirator for efficient airway clearance and removing respiratory secretions. Easy to clean collection jar.
Who Does What at Home
- Doctor / Pulmonologist: Prescribes suction as part of the patient's care plan, monitors for chest complications, treats any infection that develops.
- Registered Nurse: Performs suctioning safely, teaches family and caretaker the technique and cleaning routine, and identifies signs of infection early. For ventilator or tracheostomy patients, trained nursing presence is essential.
- Caretaker / Attendant: Handles daily cleaning of collection jars and tubing under nurse supervision or after proper training. Not a task for untrained family members without instruction.
- Family: Ensures cleaning happens on schedule, notices any equipment issues, and stocks consumables (catheters, saline, cleaning supplies).
- Equipment Supplier: Provides the machine and consumables, performs periodic service, and replaces components as they wear out.
Parts of a Suction Machine
Understanding the components makes cleaning make sense:
- Motor unit: The main body of the machine. Contains the pump. Rarely needs opening — technician service only.
- Collection jar / canister: Where the aspirated secretions collect. Usually a clear plastic container.
- Lid with fittings: Seals the jar and connects to tubing on one side (from patient) and another (to motor). Often has an anti-overflow float valve.
- Suction tubing: Runs from the jar to the suction catheter connector.
- Suction catheter: The single-use flexible tube that goes into the patient's airway. Fresh sterile catheter for each suction.
- Filter: Bacterial filter between the jar and the motor. Prevents contamination of the motor.
- Pressure gauge and regulator: Sets and shows the suction pressure.
Suction Machine Options in Pakistan
Different types of suction machines suit different needs. Coordinated arrangements often start by matching the patient's actual use pattern:
- Portable electric suction: The standard household unit. Runs on mains power. Suitable for most home use.
- Battery-operated portable: For patients who travel or need portable suction. Battery life matters.
- Heavy-duty continuous-use units: For patients requiring very frequent suctioning.
- Manual suction: Backup for emergencies during power outages. Every home with a ventilated or tracheostomy patient should have one as backup.
Renting a suction machine on rent for defined recovery periods is common; for long-term patients purchase often works out cheaper.
The Daily Cleaning Routine
After Every Use
- Suction sterile water or saline through the tubing to flush secretions out of the tubing
- Discard the used catheter — never reuse single-use catheters
- Wipe external surfaces with a clean cloth
End of Every Shift or at Least Twice Daily
- Empty the collection jar into the toilet
- Rinse the jar with cold water first (hot water can bake proteins onto the plastic)
- Wash the jar and lid with warm soapy water
- Rinse thoroughly
- Disinfect — soak in a diluted disinfectant solution as directed by the manufacturer, usually 15–20 minutes
- Rinse again with clean water
- Air dry completely before reassembling
- Reassemble with clean fresh tubing where possible
Never
- Let secretions sit in the jar for hours or overnight
- Empty the jar into the sink where dishes are washed
- Reuse suction catheters between patients or between sessions
- Use household cleaners not designed for medical equipment inside jars or on parts that contact the airway
- Skip cleaning "because the patient is not producing much"
The Weekly Deeper Clean
Suction Tubing
Reusable tubing (the section between machine and catheter connector) needs weekly deeper cleaning:
- Detach tubing from the machine
- Flush with warm soapy water
- Rinse thoroughly
- Soak in diluted disinfectant as directed
- Rinse with clean water
- Air dry hanging in a clean space
- Replace with new tubing if any discoloration, cracks, or sticky residue remains
Machine Exterior
Wipe with a cloth dampened with medical disinfectant. Do not spray liquid directly on the machine — it can damage electronics.
Filter Inspection
Check the bacterial filter. If wet, discoloured, or damaged, replace according to manufacturer's schedule. Never let liquid reach the motor through a failed filter.
Monthly Inspection
- Check tubing for cracks, holes, or sticky residue — replace if any of these
- Check gaskets and seals — replace if loose or damaged
- Inspect the collection jar for cracks or cloudiness that will not clean off
- Check the motor sound — unusual noises may indicate service needed
- Confirm pressure gauge readings are accurate
- Check that alarms and safety features work
Correct Disinfectants
Not every household cleaner is suitable for medical equipment. Options commonly used:
- Diluted sodium hypochlorite (bleach): Usually 1:10 dilution. Effective for jars and tubing. Not for the motor unit exterior.
- Medical-grade quaternary ammonium disinfectants: Sold specifically for medical equipment cleaning. Follow label directions.
- 70% alcohol: Good for surface wiping of the machine exterior, but not for soaking jars or tubing.
- Hydrogen peroxide-based cleaners: Sometimes recommended by manufacturers.
Confirm which specific disinfectants are compatible with your machine's material — the manufacturer's manual specifies. Some plastics are damaged by certain disinfectants.
Consumables to Keep in Stock
Running out of supplies at 2 AM is dangerous. Keep in stock:
- Suction catheters of the correct size — a week's supply minimum
- Sterile gloves for catheter handling
- Sterile saline for flushing
- Clean spare collection jar (for use while the primary is being cleaned)
- Spare tubing
- Replacement bacterial filters
- Disinfectant solutions
- Manual suction backup for power outages
Suction Technique — The Basics
Cleaning matters most because suction itself is used repeatedly. The technique reminder:
- Wash hands. Sterile gloves for tracheostomy suction.
- Correct catheter size — too big damages the airway, too small does not clear secretions
- Set correct pressure — usually 80–120 mmHg for adults, less for children (as prescribed)
- Preoxygenate the patient if saturation is borderline before suctioning
- Insert the catheter without applying suction
- Apply suction only while withdrawing, never advancing
- Limit each pass to 10–15 seconds — longer drops oxygen dangerously
- Rest between passes to allow oxygen recovery
- Monitor saturation and heart rate throughout
- Flush the tubing with saline after use
- Dispose of catheter, remove gloves, wash hands
This is a technique that needs proper training from a nurse — not something to learn from a YouTube video.
Common Mistakes Families Make
- Not Cleaning the Jar Between Shifts: Overnight standing secretions grow bacteria rapidly.
- Reusing Suction Catheters: Always fresh catheters for each pass.
- Using Hot Water First: Bakes proteins onto plastic surfaces.
- Skipping Disinfection: Soap and water alone do not disinfect.
- Not Drying Completely: Wet parts encourage bacterial growth.
- Not Having Backup: Power fails, machine breaks — no backup means no suction when the patient needs it.
- Ignoring Machine Sounds: Reduced suction power means service is needed.
Red Flags: When to Seek Emergency Help
Contact the doctor or take to the emergency room / call 1122 for any of the following:
- Airway obstruction not clearing with suction
- Sudden severe drop in oxygen saturation despite suctioning
- Bluish colour around lips or fingertips
- Significant bleeding from the airway after suctioning
- Sudden fever with worsening respiratory status — possible new pneumonia
- Suction machine failure with no backup available for a dependent patient
For patient-friendly background on airway clearance and tracheostomy care, the NHS guide to tracheostomy care is a reliable reference. For your patient's specific suctioning protocol, follow the treating doctor and nurse.
Frequently Asked Questions
This page is general information about equipment hygiene and is not medical advice. Always follow the manufacturer's cleaning instructions and the specific clinical guidance provided by your healthcare team.